
If you’ve signed up for solar — or are about to — you probably have questions. How long will my house be a construction site? Will they damage my roof? When will my electricity bill actually start going down?
The good news: a typical residential solar panel install takes 30–90 days from contract to switch-on, but actual physical work on your home is just 1–3 days. The other time is paperwork, inspections, and utility approvals. Here’s a complete walkthrough of the solar panel installation process so you know exactly what’s coming.
Step 1: Initial Consultation and Site Survey (Days 1–7)
It starts with a phone or in-person consultation. The installer will ask:
- Your average monthly electricity bill
- Roof type, age, and orientation
- Any shade from trees or buildings
- Future energy needs (electric car, heat pump, etc.)
Then they’ll send a technician to your home for a site survey. They’ll measure roof angles, check structural integrity, identify shade patterns through the day, and inspect your existing electrical panel.
This visit takes 60–90 minutes. They’ll usually use a drone or specialized software to map your roof. Don’t skip this step — a contract without a site survey is a red flag.
Step 2: System Design and Quote (Days 5–14)
After the site survey, the engineer designs a system specifically for your home. This includes:
- Number and placement of panels (computed for max sun)
- Inverter type and location (string vs microinverter)
- Wiring path and electrical panel upgrades (if needed)
- Estimated annual energy production
- Detailed itemized cost
Expect 7–10 days for this. Reputable installers iterate the design with you — most homeowners want fewer or more panels, or different placement. You’ll receive a proposal document with diagrams, equipment specs, and an annual production estimate.
Step 3: Contract and Down Payment (Day 14–21)
Once you agree to the design and price, you’ll sign a contract and pay a deposit (usually 20–40% of the total). The contract should specify:
- Start and completion dates
- Equipment make and model
- Warranty terms
- Performance guarantees
- Cancellation terms
- Payment schedule
Read everything before signing. Reputable companies welcome questions and revisions; the dodgy ones rush you.
Step 4: Permits and Paperwork (Days 21–60)
This is the slowest part of the process — and the part most homeowners don’t realize takes weeks. Your installer applies for:
- Building permit (city/municipal corporation)
- Electrical permit (electricity board or DISCOM)
- Net metering application (so you can sell excess power back to the grid)
- Subsidy paperwork (PM Surya Ghar in India, ITC in the US)
- Property assessor notification (some areas)
Permit timelines very wildly. In India, a typical urban permit takes 4–8 weeks. In the US, 2–6 weeks. Rural areas are sometimes faster, sometimes slower.
A good installer keeps you updated weekly. If yours goes silent, follow up.
Step 5: Equipment Delivery (Days 35–55)
Once the design is locked in, your installer orders equipment. Panels are usually shipped from a regional warehouse and arrive within 1–3 weeks. Inverters and racking arrive separately.
Most installers store the equipment until install day. Don’t store solar panels yourself — they’re fragile and need careful handling.
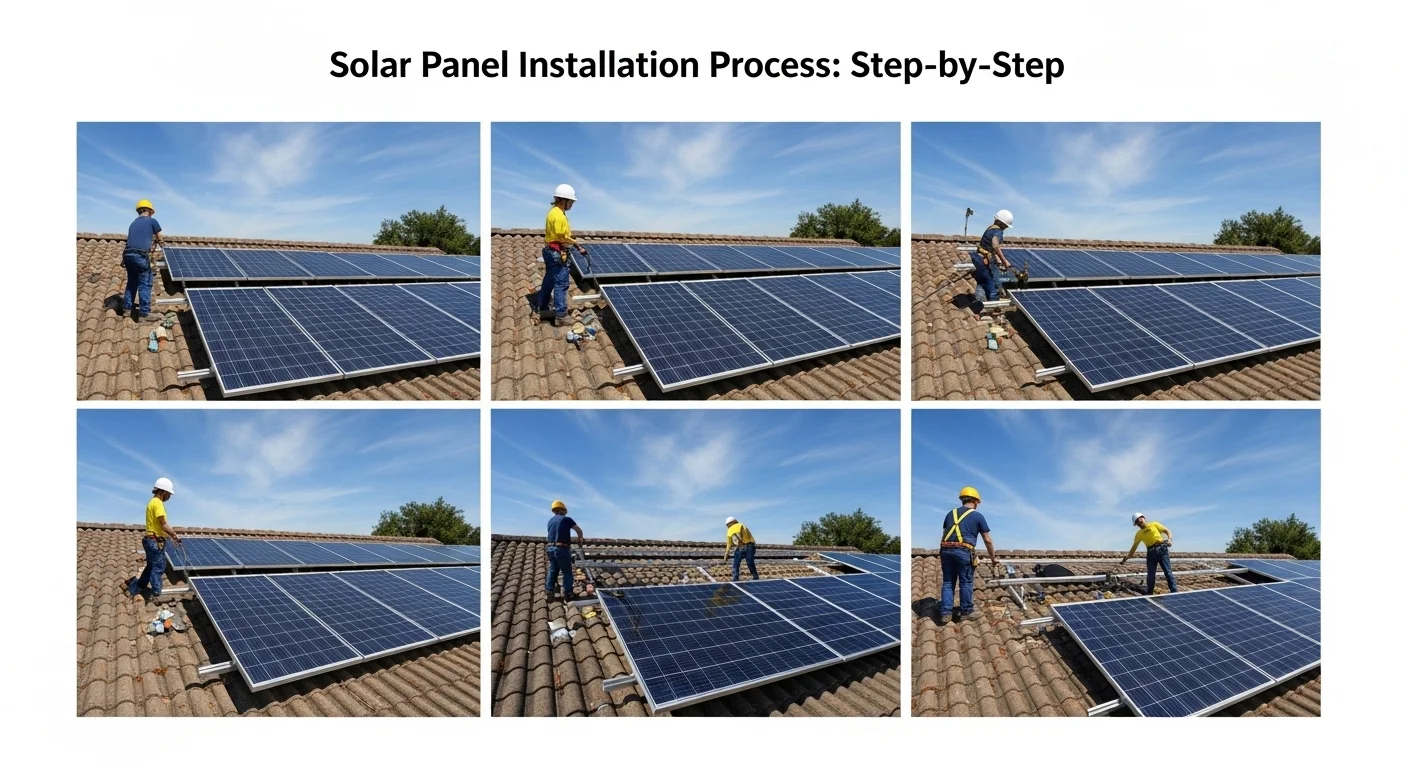
Step 6: Roof and Mount Installation (Day 60, Half Day)
Install day finally arrives. The crew begins early — typically 7 or 8 AM. The first task is mounting the racking system:
- Roof penetrations are made carefully, usually into roof rafters for structural support.
- Each penetration is sealed with flashing and waterproof sealant to prevent leaks.
- Aluminum or steel rails are bolted to the mounts.
This takes 3–6 hours depending on roof complexity. A good crew will leave the roof more weatherproof than they found it.
Step 7: Panel Mounting and Wiring (Day 60, Afternoon)
Once the racking is in place, the panels are bolted to the rails. They’re typically mounted in groups of 5–10. The installer then runs:
- DC cables from each panel into a junction box
- DC cables from the junction box to the inverter
- AC cables from the inverter to your home electrical panel
- A new breaker (and possibly a panel upgrade)
- Monitoring equipment
This takes another 3–6 hours. By end of day 1 or day 2, the physical install is usually complete.
Step 8: Inspection (Days 60–80)
The system can’t be turned on until government and utility inspectors approve it. Expect two inspections:
- Building/electrical inspection by the local authority
- Utility inspection by your DISCOM (India) or utility company (US)
Inspectors check that the wiring is correct, the system is properly grounded, the racking is secure, and that everything matches the approved design. Pass rates are usually 85–95% on first attempt — good installers don’t make mistakes that get caught here.
Step 9: Grid Connection / Permission to Operate (Days 75–90)
After passing inspection, your installer submits final paperwork to the utility. Within 1–2 weeks, you’ll receive Permission to Operate (PTO) — the official greenlight to switch on your solar system.
This is the day your system actually starts producing — and your meter starts running backwards.
Step 10: Activation and Monitoring (Day 90)
The installer comes back to switch on the system, walk you through the monitoring app, and verify that production matches the design estimates.
You’ll see your first real solar production within minutes — most monitoring apps show kilowatt output in real time. Over the next few weeks, you’ll see:
- Daily energy production (peaks midday)
- Monthly comparison to your old electricity bill
- Cumulative carbon offset (a fun bonus stat)
Common Delays and How to Avoid Them
- Permit holds — Verify your installer applied promptly. Don’t be afraid to ask for application receipts.
- Equipment shortages — Tier-1 panels sometimes have wait times. Confirm availability before signing.
- Roof issues found during install — If your roof needs repair, address it before solar. Re-roofing under existing panels costs 3–4x more.
- Subsidy paperwork lost — In India, ensure your installer submits PM Surya Ghar paperwork properly. Subsidies have been delayed by months in some cases.
Final Thoughts
A typical solar panel installation process spans 60–90 days, with only 1–3 days of actual physical work at your home. The rest is design, permits, and inspections — slow but essential. Knowing what to expect at each stage means fewer surprises and more confidence in your installer’s work.
When your system finally turns on and you watch your meter run backwards for the first time, all the patience pays off. You’re now powering your home with sunlight — for the next 25 years.